If you hadn't already heard, M.A.C have launched their latest mascara, the M.A.CStack Mascara; aka the new must-have product makeup maestros, offering un-matched, stackable length and volume to your lashes. To celebrate the launch of this new makeup icon, LOOKFANTASTIC teamed up with the cult-favourite makeup brand for a night of glitz and glamour.
We caught up with M·A·C’s Digital Learning & Education Trainer, Natalie Price (@natinalondon) ahead of the event to get the complete how-to tutorial for her party-ready look as well as her top tips and picks when it comes to makeup for darker skin tones.
Get the look..
Step 1: Prep and prime
Natalie always starts and finishes her look using the M.A.C Prep + Prime Fix + Magic Radiance to add moisture and give the skin a luminous glow. She sprays the vitamin E packed formula onto the skin and then presses it in using her fingertips to help it absorb.
She then uses the M.A.C Studio Fix Mattifine 12 Hour Shine-Control Primer on her T-zone to minimise the appearance of pores and control oil production, preventing any unwanted shine throughout the night.
Finally, to give that added boost of radiance before foundation, she applies the M.A.C Strobe Cream in Goldlite to the top of her cheek bones, pressing it in with her fingertips so that it sits on the skin properly.
Step 2: Base
Natalie first applies the M.A.C Studio Fix 24-Hour Smooth Wear Concealer in shade NW35 to her under eyes, sides of the nose and above the lip, pressing the product in with her fingertips to create a natural-looking contoured effect from under her foundation and colour correcting any uneven areas.
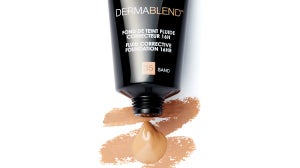
She then applies her M.A.C Studio Fix Fluid SPF 15 Foundation in shade C8 using the M.A.C 170s Foundation Brush. She starts at the centre of her face, blending the foundation outwards to avoid any unwanted lines.
With 67 shades, Natalie loves this foundation for a seamless, natural look no matter what your skin tone. When it comes to choosing the right shade for you, Natalie advises to first identify your undertones by identifying what colour your veins are. If they're mostly blue or purple, you are likely to have cool undertones, if they match the colour of your skin, they're probably neutral or if they're mostly green, then you are likely to have warm undertones. When testing your makeup, she encourages to "swatch your products in different zones of the face to see which areas they most flatter; buff and blend your swatches as products can often set to a different colour than they appear in the bottle. A minimum of 3 swatches of the same product allows you to see the shade and/or coverage you prefer most".
Going back in with her M.A.C Studio Fix 24-Hour Smooth Wear Concealer in shade NC35, Natalie adds more definition to her under eyes, sides and bridge of the nose, above the mouth and just under the cheekbones.
"Concealers can be used to highlight, and to correct and conceal; think about what you want to achieve and which undertones will best help you to do so. I use two shades of the same concealer, one with more of a warm undertone to even out my skin before foundation and one to brighten my under eyes so I use the same tone of my foundation which is cool toned but just a couple of shades lighter".
Step 3: Contour
Natalie adds further definition and enhances her natural bone structure using the M.A.C Studio Fix Sculpt and Shape Contour Palette in Medium Dark. Natalie's top tip: contour with a tone 2 shades darker than your natural skin tone to add depth and definition. She uses a contour brush to apply the product just under the curve of her cheekbone and jawline and then switches to the M.A.C 224 Brush to contour the sides of her nose, allowing the brush to hug the natural curve of her nose.
Next, she uses the M.A.C Mineralize Skinfinish Natural Powder in Dark Deepest to add warmth and colour back into her complexion. "This adds a velvet finish to the skin and sets the foundation. Natalie adds the Medium Tan shade to the naturally lighter areas of the face, blending into the Dark Deepest.
When it comes to picking the right contour products for you, Natalie recommends using a deeper shade with similar undertones to your skin. When it comes to highlight, "the Mineralize Skinfinish in shade Global glow and for deeper skin tones Mineralize highlighter in shade Cheeky Bronze".
Step 4: Eyes
Natalie creates a smooth base for her eye makeup using the M.A.C Prep + Prime 24-Hour Eye Base. She uses her fingers to evenly distribute the formula from the inner corner of the eye all the way to the brow bone.
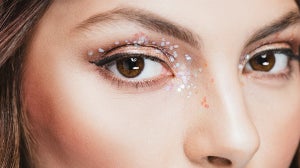
She creates her smokey eye look with a touch of dazzle using the M.A.C Eyeshadow Palette Semi Sweet, starting with the darkest shade on the outer corner of the eye to shape and open up the eye. Natalie's top tip: mirror everything you do on both eyes as you go to ensure they look even. She adds some sparkle and glam to her eyes using the M.A.C Dazzleshadow Liquid in Not Afraid To Sparkle, using her fingertip to gently dot the liquid into the middle of the eyelid. For a more sultry look, Natalie adds the M.A.C Eye Kohl Pencil Liner in Costa Riche to her lower waterline, holding the lower area down using her concealer brush so not to interrupt her base makeup.
For a more vibrant look, Natalie also loves the M.A.C Art Library - Flame-Boyant: "the shades are really warm and bright so compliment my skin tone. The colours are so pigmented too so can be seen on any skin shade".
Natalie completes her eye look with the M.A.CStack Mascara and stacks on the layers for a full, voluminous lash effect. The jet black mascara adds curl, volume and length using the fine bristles and precision tip that coats every lash evenly from root to tip.
Step 5: Blush
Natalie adds a pop of colour to her complexion using the M.A.C Glow Play Blush in shade Cheer Up. She applies the shimmering formula to the apples of her cheeks, blending upwards for a lifted effect.
Natalie also loves the M.A.C blush in shades Burnt Pepper, Frankly Scarlett or Raizin powder for deeper skin shades. "Cream or powder blushers with a stronger pigment to them work really well for deeper skin tones".
Step 6: Lips
Like with her base and eyes, Natalie preps her lips before applying makeup using the M.A.C Prep + Prime Lip. This conditions and hydrates the lips and creates a smooth canvas for lipsticks and glosses, preventing any feathering throughout the night.
Next, she applies the M.A.C Lipstick in Velvet Teddy. A favourite shade for Natalie, you can get a similar effect for deeper skin tones with "a shade or two deeper, for a nude lipstick such as MAC Taupe matte lipstick or for even deeper shades try Antique Velvet matte lipstick".
When it comes to identifying the perfect nude lip for your skin tone, Natalie explains that it will vary according to each wearer. "Picking a shade two shades lighter than your natural lip colour will still maintain a natural look for any skin shade without it adding too much colour or washing out the overall makeup look".
She adds definition and dimension to her lips using the M.A.C Lip Pencil in Cork, outlining the outer edge of her lips with the pencil and lining it over the lipstick to create a soft finish.
Step 7: Set
Natalie starts as she began by setting her flawless, party-ready look using the M.A.C Prep + Prime Fix + Magic Radiance.
Related Articles