The reverse cat eye trend that’s taking over TikTok
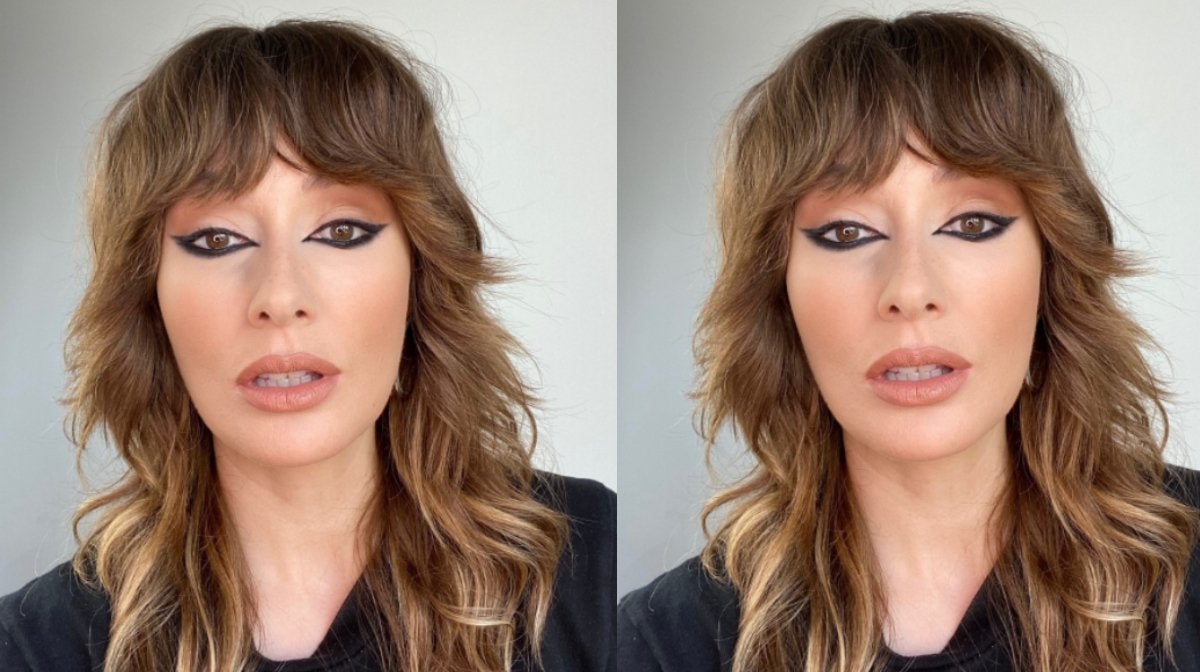
Taken straight from the catwalk, the reverse cat eye is the latest beauty trend to hit our screens by storm. We caught up with Mel Barrese, Head Makeup Artist, THG Colour Brands (@melbarrese_makeup) who shared everything you need to know about the signature look.
Where did the reverse cat eye trend originate from?
This is actually a classic eye look, but it has been reformulated and given a name by social media. There’s always so much focus to the upper eye, but actually applying product to the bottom lashes is very flattering and glamourous.
Why is it so universally flattering?
The reverse cat eye is so flattering as it makes your eye look more almond, elongated and lifted, all of which are the most universally flattering and beautiful. It helps to give lift to the eye by almost pulling the eye upwards at the outer edge and this alone makes it perfect for all eye shapes and all ages. Even when you are doing a more classic eyeliner or even smokey eye, as a Makeup Artist your goal is to always make an eye look lifted and almond. This is a key technique in beauty makeup and the reverse cat eye is a perfect example of this technique.
What products and tools do you need to create it?
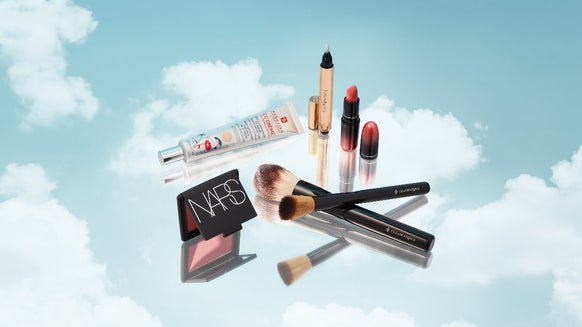
To create this look you need key eye lining products in black, namely a pencil eyeliner, a gel or pen eyeliner and then a matte black eyeshadow.
The pencil is great for filling in the waterline, you can’t always do this with some eyeliner gels or pens and definitely not eyeshadow, so a deep black pencil like Illamasqua’s SOPHIE is key for this part of the look. When it comes to creating the main body of the liner, I like a gel or pen eyeliner, as you can apply these very easily and they will also allow you to get a very fine flick both at the inner and outer corner. An eye lining pen, like Eyeko’s Black Magic will flow easily with no drag and a super sharp point, while Illamasqua Precision Gel Liner teamed with the liner brush gives you a little more control but will still allow you to get the fine detail at the outer edge. Remember: while the liner’s main focus is underneath, there is still a very fine eyeliner on the top of the lid, and both of these product types will also help create this element of the look too. The reverse cat eye is also slightly smudged underneath. You can do this with eyeliner but a black eyeshadow will make it look really smooth.


Recommended Retail Price: £16.00Current price: £3.20

How do you create the look?
Step 1: Start by applying eyeliner to the bottom lash line, getting as close to the roots of the lashes as possible. At this stage just apply along the lashes and then with a small fluffy blending brush, smudge this out slightly so you eradicate any harsh lines.
Step 2: With a clean cotton bud or eye-lining brush, pull out at the outer edge following the imaginary line your lash line creates, going upwards toward the brows.
Step 3: For the inner corner, apply the eyeliner right in the inner corner, pulling the product out slightly past the tear duct, following the natural shape of the eye. As before, get a clean cotton bud or eye-lining brush and drag the product out to create a fine, faded flick.
Step 4: Take some eyeshadow in the same colour as the eyeliner and, with a small blending brush, apply on top of the eyeliner, blending it backwards and forwards for a smokey, blown-out look.
Step 5: Apply pencil eyeliner to the waterline, making sure it has the same intensity as the liner beneath the lashes.
Step 6: Next apply a very thin eyeliner to the top lashes, this needs to hug the eye, joining the liner to the inner corner and outer corner bottom liner.
Step 7: To finish the look, apply lots of mascara. You can even apply a soft, warm peach eyeshadow to the crease, to add some warmth to the eye look.
What's the secret to a clean, wobble-free finish?
The key to applying eyeliner is just to apply it and then using a Q-Tip and micellar water to clean away any wobbles or smudges, rather than trying to get it perfect in one go. Sometimes we get so wrapped up in ensuring the liner is applied perfectly, but most MUAs will apply the product roughly where they need it to be and then will tidy up any areas which they don’t need or that have gone array. If you struggle with eyeliner, it’s important to experiment with the product you are using. I would suggest a gel liner like Illamasqua Precision Gel Liner, used with a thin eye-lining brush as the formula is a thick gel so you get a lot of control and it doesn’t run away on you, so to speak.

£5.00

£3.50

£18.00
Does it have to be black liner or is any colour go?
This look doesn’t have to be black, in fact if you want something softer, a dark brown would be amazing. You will still get the same overall look and intensity but it won’t be as strong against your skin. Alternatively, you can also do this look with bright pops of colour, such as blue, green or even pink.

Does this work with hooded eyes? If so, how do you go about it?
One of the best things about the reversed cat eye is it is perfect for all eye shapes. This is because more of the focus is on the lower lash liner and there’s only a small amount of product on the top which hugs the eye and goes to a slight flick. This means you’re not having to really navigate the eyelid.
What can you do to clear up any mistakes?
Cotton buds and micellar water are your best friends when it comes to creating any eyeliner look, but especially the reverse cat eye. They allow you to apply product and then precisely wipe away any mistakes or mishaps. If you are using waterproof formulas, make sure you swap micellar water for something that removes long-wear makeup. Once you’ve cleaned away your mistake, allow the micellar water to dry or blot the area with a tissue before reapplying more product.

£5.49

£4.99

Recommended Retail Price: £4.49Current price: £2.96
Any other tips or tricks for nailing the look?
To ensure you get super fine, pulled out points at the inner and outer corner, apply your eyeliner and then with a dry cotton bud or a thin, clean eyeliner brush, pull upwards and outwards. This will drag the product out and will give you a fine, but slightly faded-out point.
Want to recreate the signature cat eye? Shop all products at LOOKFANTASTIC.
As a beauty fanatic I'm always on the lookout to try and experiment with new products! I’ve been writing about everything beauty for over 3 years and specialise in skincare so have plenty of tips and tricks to help put blemishes at bay and get your complexion glowing. Whilst being a content writer at LOOKFANTASTIC I’ve had the opportunity to collaborate with incredible brands including Tom Ford, Dolce & Gabbana and La Mer, taking my understanding of the industry to the next level. In the past I’ve been a freelance makeup artist and have collaborated with brands including NYX and Revolution Beauty on a personal level, sharing my makeup creations for the world to see. My ride or die brands have to be PIXI, Laura Mercier and Bobbi Brown and I can’t live without my trusty MAC Velvet Teddy!