How To Achieve Your Party-Perfect Christmas Tan
The party season is here and our weather-worn skin needs to be revamped and party-perfect for that Christmas tan. Here are some top tips from the fabulous Eloise at Bronzie, who is a serious tanning expert to get you there…
3 Days Leading Up To Your Tan
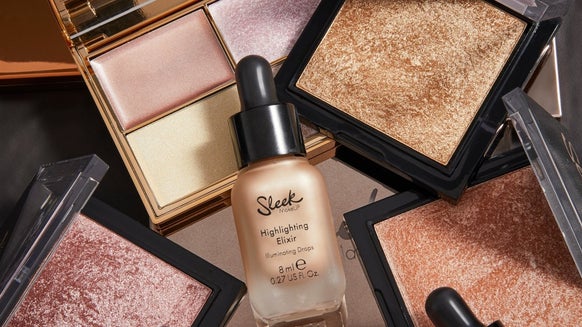
Start exfoliating and moisturising as this will help to get the glow back into your skin. One of the best exfoliators is the St. Tropez Enhancing Body Polish, which helps to remove dead skin, making the tan application smoother and skin brighter. Apply more to the areas where the skin tends to be dryer - elbows, hands, knees, feet, arm creases and where your bra strap sits. Follow by using the St. Tropez Tan Enhancing Body Moisturiser.

£10.00

£10.00
24 Hours Before Tan Application
Ensure all your hair removal is complete, though it is recommend to shave the underarms the day after application for a clean finish.
12 Hours Before The Tan
A final exfoliation is recommended. So, if you’re tanning in the morning, exfoliate the night before. If you’re tanning in the evening, exfoliate that morning.
On The Day Of Application
Just after washing, shower down with some cool running water to help close pores and cool down your skin. If your skin is too hot before tanning, you can perspire and cause the skin to reject the tan. Your skin also needs to be product-free – no moisturiser, deodorant, perfume or makeup.
Directly Before The Tan
Apply the St. Tropez Moisturiser to your hands (including inner-wrists), elbows, knees and feet. Use whatever remains on your hands to rub into the creases of the underarm.
For The Tan Itself
Use the Bronzie ‘Got Your Back’ Tanning Mitt, especially designed to access those hard-to-reach areas and tan your entire body all in one go. For the tanning product, the St. Tropez Bronzing Mousse is great as it adapts to your own natural skin complexion, leaving a silky finish.
Legs: Apply the tanning product to the two mitt ends (and keep adding product to the mitt as required), using upward motions from the shin towards the thigh. Leave the knees and feet until last. Use the remaining tanning product to brush over knees, feet and to the toes. Repeat on the other leg.
Back: Apply the tanning product to the middle section of the mitt, place each hand in each mitt and wrap the panel around the back. Starting from the lower back, pull the panel from side to side, moving upwards. When you reach the upper back area, use diagonal movements across the shoulders.
Front: Using the mitt ends, apply the tanning product to the tummy area, up towards the chest and then onto your shoulders and neck. Using the tanning product remnants left on the mitt, apply around the underarm and then, with the tan-free side of the mitt, buff in towards the centre of the underarm.
Arms: From your shoulder, apply the tanning product down the arm, leaving the elbows and hands until last. Brush over the elbow while it’s bent, to avoid crease lines. Apply down towards the palm, but leave a two-inch gap before the wrist line (use the tan-free end of the mitt to buff the product to the wrist line for a natural fade). Make a claw-like shape with your hand and brush the remaining tanning product over the tops and over each finger. Repeat on the other side.
Face: Using the remaining tanning product on the mitt, pat over the face and ears.
To finish: Apply a wet wipe to clean fingernails, palms and toenails.
Finally, step into your Bronzie After-Tanning Jumpsuit… voila, the perfect Christmas tan!

Our team of beauty experts cover everything from makeup to skincare, picking out the most effective products from the best brands and latest trends. Stay up to date on everything beauty with the LOOKFANTASTIC blog, and find all your essentials in one place.