How to Lay your Edges
Laying edges is an art form; the finishing touch that takes any simple hairstyle from a five to a straight ten. Famously tricky, sculpting the perfect shape for your baby hairs and keeping them firmly in place can be a bit of a mission. Remember when people used old toothbrushes to lay their edges? Well, we’ve moved on. There are now specific tools and methods you can use to get a flawless finish, every single time.
If you’re ready to slay your edges, then you’ve come to the right place.
What are laid edges?
Also known as baby hairs, edges are the wispy strands that grow around your hairline. This new growth (or baby hair) can frizz easily and is difficult to secure into styles, due to the short length. A great way to combat this frizz is to lay your edges, creating a more artistic hairstyle.
“Laying your edges” refers to the way in which these baby hairs can be styled using gel. Some people create little spirals, loops or curved paths – the creative side is really up to you.
How To Lay Your Edges
Step 1: Moisturise your edges
Make sure you start with dry edges. If your hair is wet or damp, the edges will simply move out of place once they're dry, putting all your good work to waste.
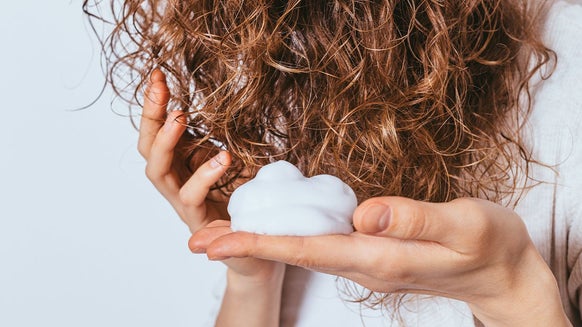
Dab a little bit of moisture onto your hairline, but not too much, or you’ll oversaturate the delicate baby hairs. Choose a lotion or milk product - a lightweight consistency will work best for this style. Using a paddle brush, gently work the product through. This forms a moisture barrier to protect your hair from the gel, which can strip the strands of their natural moisture. Stay away from products with high alcohol content, they’ll dry out your hair even more.
Here are our favourite curl milks and moisturisers:
If you're following the Curly Girl Method, check the ingredients list first.

£8.50

£11.99

£22.00

£10.99

£16.99
Step 2: Edge Control
Although you can use gel, I would recommend going in with edge control. These formulas are specially designed for delicate baby hairs, providing lasting hold without stripping the strands of their natural moisture.
If your edges are especially hard to pin down or you want a seriously sculpted look, try something with extra hold, like the

£8.21
If you suffer from weak, breaking or brittle edges, try an edge control that’s infused with strengthening ingredients, like the

£7.99
If you want great hold without supergluing your hair to your scalp, go for Mielle Organics Honey & Ginger Edge Gel or the

£14.34

Recommended Retail Price: £7.45Current price: £5.96
Step 3: Brush down your edges
Forget your old toothbrush, we finally have baby hair brushes. Specifically designed for the art of laying edges, they really are the greatest thing since sliced bread. The Cantu Baby Hair Brush is my favourite, and the tool I used to create every style in this article.
Dual-ended, this tool has everything you could wish for. The comb end is armed with close teeth, ideal for separating wriggly baby hairs, while the sturdy brush side smooths down even the thickest hair with ease. At such a modest price, it would be rude not to.

£3.00
Use the brush to bring down the baby hairs you want to work with. Tie the rest of your hair back, then gently brush down from your hairline to bring down your baby hairs, like this:
Step 4: Sculpt & Style
Now, the hard bit.
Apply edge control or gel to the section you’re working with. Just dab your finger into the pot, then apply it to the baby hairs using a downwards motion. This will start to lay down your edges, giving them a little shine.
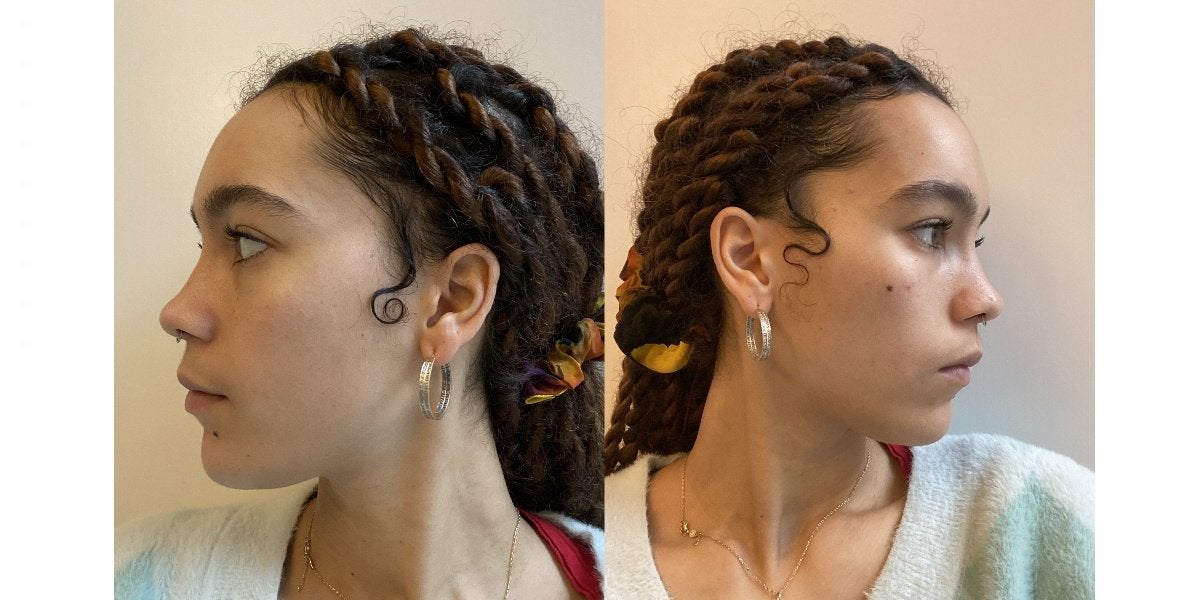
Next, go in with the thick bristled end of your brush, using it to create curves and waves. As you can see in this picture, I’ve used the brush to guide the hair, creating a subtle curve. You can stop there if you like, or have even more fun with some swirls and streams.
Swirls & Streams
These are two of my favourite styles when it comes to edges, and they're really not as hard as they look. The most important thing when it comes to swirls and streams is don’t rush. Unless you’ve tried this before, this isn’t a five-minute job, so make sure you set aside some time to try it out. It’ll take a few goes before you get exactly what you’re looking for – so be patient. They're great for any big night, like Christmas parties, events or birthdays.
Swirls look like this:
Streams look like this:
How to create swirls and streams:
Before you begin, make sure all the baby hairs above the section you want to swirl or stream are already sculpted. When I say above, I mean anything upwards of the section you’re working with. You can’t go back with edges, so you have to work from top to bottom. - Make sure you have enough hair to work with. I use my sideburns, starting my swirl or stream near the top of my ears.
- Just like before, use your fingers to dab gel onto the section, moving in a downwards motion. Use the brush to evenly distribute product through your hair and guide it downwards.
- Use your fingers and the brush to narrow the section, leaving a long and thin bit of hair to work with.
- Next, use the brush to create the style you want.
To create the curves, use a curving motion with the brush to guide the hairs into the desired style. Use your fingers to hold the first curve in place while you start the next. Use this method to move from curve to curve, until you come to the end of your hair.
To make a swirl, start with a small curve before shaping your hair into a spiral. Again, use your fingers to keep each ring of the spiral in place before starting the next one.
Finishing Touches
Now you're finished, use your fingers to smooth a little more gel onto your edges. Again, go with the hairs, rather than against them, smoothing the product over your artwork. This helps to secure the style, while also giving the look some extra shine.
Finally, wrap your new style under a silk or satin headscarf. This helps to secure your style into place, while also keeping them out of the way for you to do your makeup.
Top Tips
Having trouble keeping your edges down? Apply a little bit of edge control onto the skin, where you want the baby hairs to stick. The gel acts as an adhesive, sticking the hair to the desired area. Then, using the back of the brush, press down on the hair to set the style firmly in place, like so:
Want to find more products that specifically cater to curly and coily hair? Shop according to your hair type using the Curly or Afro & Textured sections, here on LOOKFANTASTIC.

Our team of beauty experts cover everything from makeup to skincare, picking out the most effective products from the best brands and latest trends. Stay up to date on everything beauty with the LOOKFANTASTIC blog, and find all your essentials in one place.