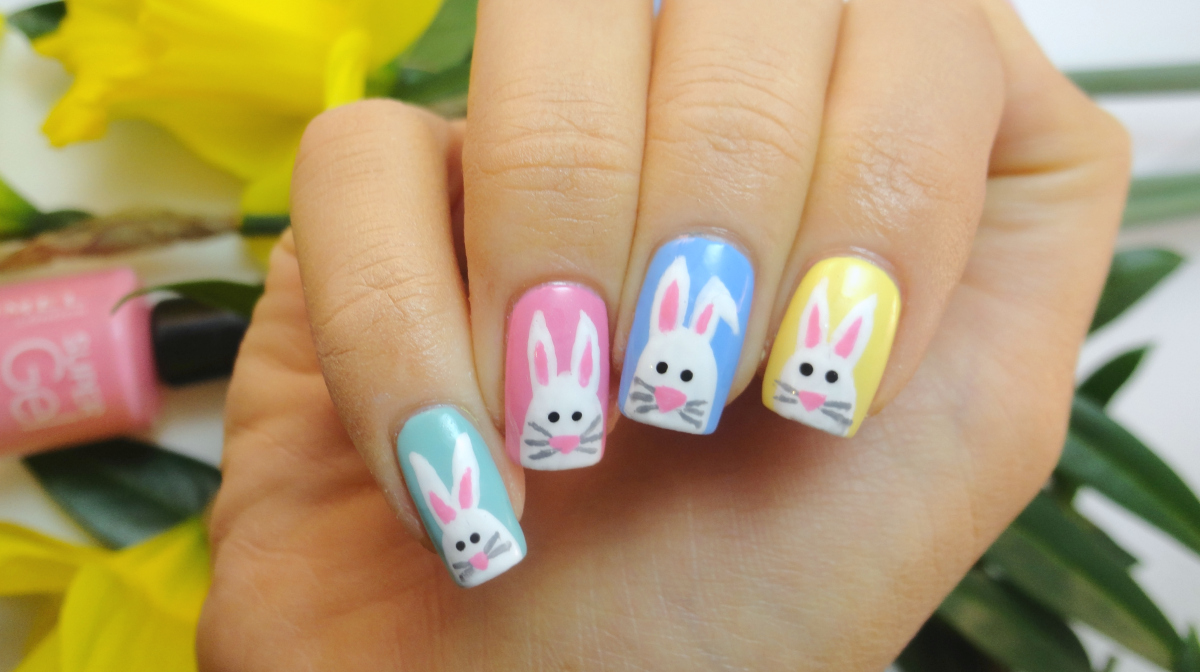
Easter is just around the corner, and if you're lucky enough to have a couple of days off for the Bank Holiday then it's a perfect time to pamper yourself with a proper manicure!
The Rimmel Super Gel collection is launching on Lookfantastic very soon, so we asked our resident to put them to the test and use the gorgeous pastel shades for some Easter nail art. Just follow her easy steps to create this cute Easter bunny manicure!
STEP 1.

Prep your nails by filing away any rough edges and applying your chosen base coat. OPI Nail Envy is my go-to as it protects my nails and helps strengthen them at the same time. Once that's dry, apply two or three coats of your pastel nail polish.
STEP 2.

With your base colour down, it's time to get creative! Use a fine nail art brush and a good white nail polish to draw the outline of your bunny. Start with the head and make sure you leave plenty of space to draw the ears. Don't worry if it's a little streaky at first, you can always go over any patchy areas to build up a solid colour.
STEP 3.

Now use your pastel pink polish to add in the nose and ear details. Make sure you keep a cup of Acetone or strong nail polish remover handy so that you can clean your brush regularly - don't let the polish build up on the brush or you will struggle to paint fine lines.
STEP 4.

Take a dark grey or black polish and use the very tip of your brush to draw on some whiskers. For the eyes, use a small dotting tool dipped in black nail polish (If you don't have a dotting tool to hand, then the end of a bobby pin should work just as well!)
STEP 5.

Leave the polish to dry and then seal in your design with top coat. Be very careful when you're applying your top coat not to drag the brush or you might smudge your nail art. I find it's safer to almost dab it on across most of the nail and then gently smooth it down at the edges. Finish of with some cuticle oil to replenish moisture.
Top tip - If you have any stray polish around your cuticles, use a small makeup brush (eyeshadow or eyeliner brushes work well), dip it into some nail polish remover and carefully brush away any excess around the edge of the nail. This should give you a really neat, professional finish!
Shop the Products Used

Related Articles
